Friday, July 8, 2011

Doodle-do

thankyou


Need to say thank you?

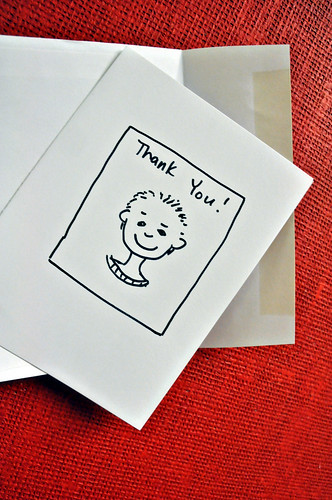
We love to say thank you with drawings on plain paper.

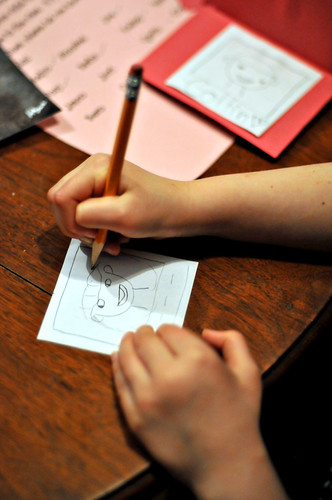
Parents can draw the square borders, ears, neck and chin so the figures are roughly the same size, and kids can add the hairline and faces to make them unique.

Give kids a class picture as a visual aid and you have an easy, inexpensive and personalized way to make thank-you cards, valentines, notes or invitations.

Labels:

Wednesday, June 8, 2011

All little piggies go to market

producers


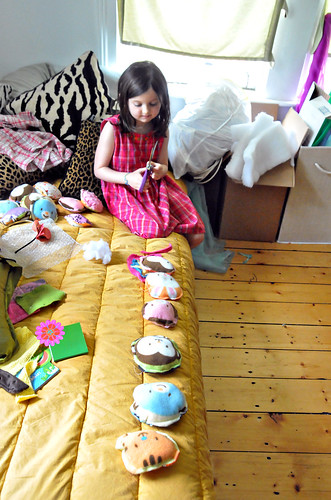
She was busy, she and her friend, making mincemeat out of my fabric stash.

I wasn't going to complain. The decimation of sale-bought cotton fleece is the price one willingly pays to be able to clean the house in peace.

As I was emptying the dishwasher and sweeping floors, they were painstakingly cutting and matching fabrics, inventorying their characters (yes, there were two of every animal on the pattern) and selecting the thread that would tie the whole thing together.

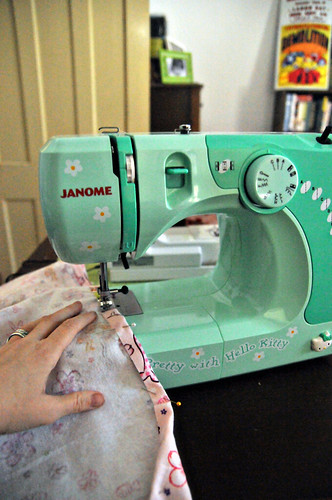
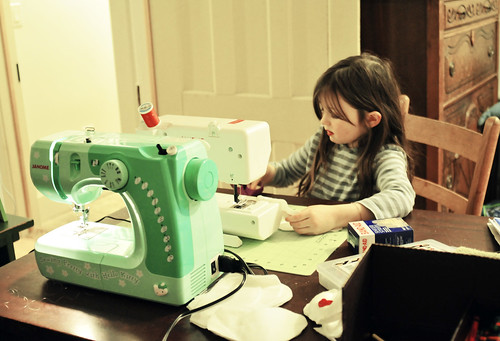
They named their little creations "Boo Boo Babies," and begged me to help stuff and sew the round forms into pillows for them. The sewing machine, though sea-foam green and emblazoned with Hello Kitty logos, is still too powerful a force for tiny fingers.

I oblige. I'd rather sew than try to scrape the crusted-over waffle batter from the kitchen counter anyway. No matter how many times I mention it, somehow the waffle maker (the man not the machine) doesn't appreciate the economy of a damp sponge when the drips are fresh.

But these children know they need to strike when the iron is hot.

That's why they leave their one-woman sewing factory and move on the most important aspect of production -- marketing.

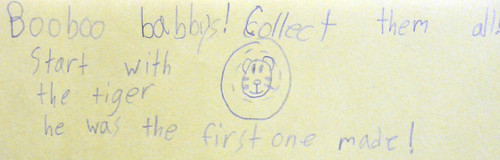
I was especially fond of this pitch:

the all important marketing component of crafting


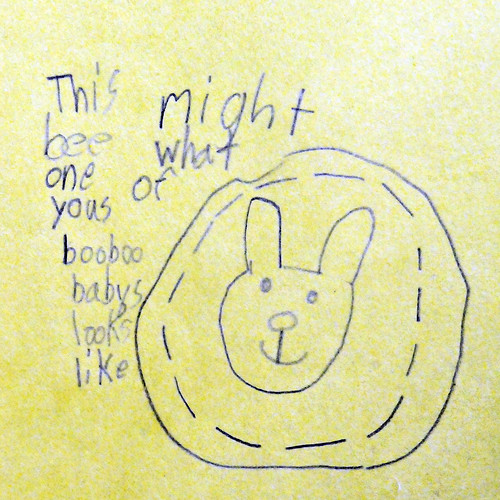
However, the disclaimer was also quite nice, given the fact I was the one sewing and my results do vary:

disclaimer

Labels:

Friday, June 3, 2011

Cut. It. Out.

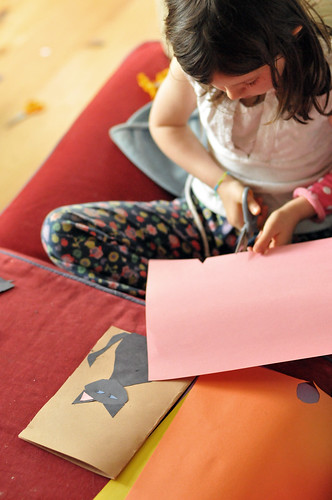
cut paper pictures


What you need:
* Construction paper
* Scissors
* Glue
* Imagination

Labels:

Tuesday, May 24, 2011

At least you won't be bored this summer

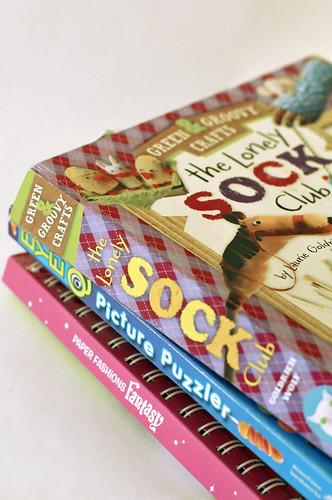
craft books


Ah ... 'Tis the season: Teachers are doing their super secret happy-dance on the grave of another school year; parents will soon be pulling out their hair for want of activities that will keep their kids independently entertained; and publishers are promising a carefree summer vacation if you buy their activity books.

Here's one thing I can honestly tell you about that last part: If the book involves crafts or cooking (and your kid is under 10) there is no way in hell you won't hear your name called at least 15,000 times in that familiar sing-song whine that makes you wish you could legally sell them to gypsies. ... So choose wisely.

IF YOU CAN'T STAND PAPER DOLLS do not buy "Paper Fashions Fantasy," Klutz, $22. Although this book is clever -- offering a bunch of different templates for tops, bottoms and accessories your budding designer can trace onto prettily printed papers, you will go out of your mind trying to figure out how to hang the fashions on the tiny wire hangers, which are provided.
Mom Rated: *Mommy Dearest Comes to MInd*
Kid Rated: *This is Totally Styling*

IF YOU HAVE A THREE-YEAR-OLD don't get "Eye Q Picture Puzzler," Downtown Bookworks, $12. It may actually keep the older one enthralled as you travel, but if you forget it's in your luggage and your graffiti-artist toddler finds it, you may be needing a visit from room cleaning service.
Kid Rated: *I Found the Rabbits!*
Mom Rated: *Where's the Pen?*

IF YOU DON'T WANT TO BUY SOCKS take a pass on "The Lonely Sock Club" by Laurie Goldrich Wolf, Simon and Schuster, $17. Because for all its "Green & Groovy" cache, your kid will not be satisfied until you part with some actual cash. The way she sees it, the cats made using old "dryer-ate-the-other-one" and "used-to-be-a-nice-color" socks will pale in comparison to the creatures featured in the book. Another tip? Ignore the no-sew directions if you want to save your sanity.
Mom Rated: *Thank GOD Target Sells Socks*
Kid Rated: *I Will Populate the World with Sock Kittens*

One final warning ...
Though your kid may not be able to MAKE the projects in the sock book without help, she WILL be able to dress them. You can estimate the resulting fashion show will keep you busy for at least an hour.

Labels:

Monday, May 16, 2011

What rainy days are made for ...

I know it's the most cliched thing going.

I've said it before. Many, many times.

But it's so true:

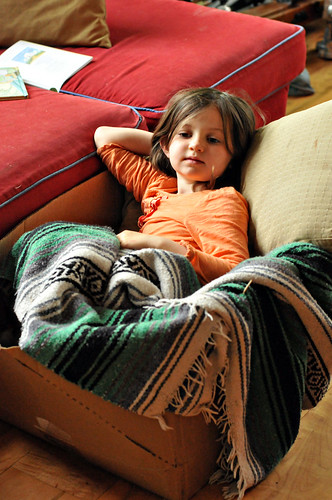
never under estimate the entertainment value of cardboard box


Even when you think they've outgrown it, there's just no telling what fun a box can be.

never under estimate the value of a plain cardboard box on a rainy day.


Here's a few more things you can do with boxes this week while you wait for the rain to go away.

Labels:

Sunday, April 24, 2011

Happy Easter!

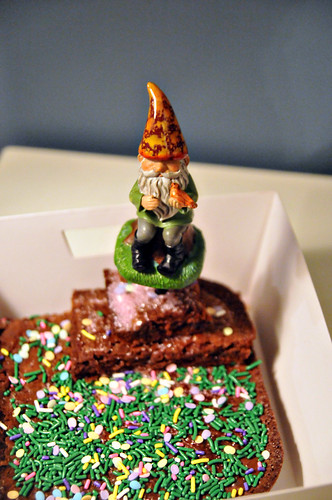
Easter Gnome garden brownie


Bunny left a Garden Gnome on a field of brownie.

The boy plowed through it pretty darn quick.

Labels:

Friday, February 25, 2011

Out of order

DAY ONE: dragon crew


I know I'm out of order with the sequencing. ...

But I'm kinda thinking I'd like to remember how we started.

They were all kind of breathing fire.

Labels:

Thursday, February 24, 2011

In need of a Craftacular intervention

DAY TWO: Parade Dragon


We're going on day three of Operation Parade Dragon and I can seriously see this entire project taking until next Chinese New Year to finish.

Every day we add a little something to the dragon.

When the paint dries it will be a feather boa for a beard ...

or for eyelids ... maybe both.

I'm trying to go slowly ... since we have MONTHS until "People's Parade," which we've decided will be optimum for a dragon dancers ... but also because I'm procrastinating until I've figured out how to proceed.

Already friends have provided me with really WONDERFUL links.

Do we want a ground dragon?

A half hoop dragon?

I never even considered the tail!

I'm thinking that I need something light-weight but somewhat strong, but that won't end up being weaponized along the parade route.

If you have any ideas you'd like to share, I'm all ears.

Labels: ,

Wednesday, February 23, 2011

Love means sometimes having to say ...

sari2
YOUR SARI


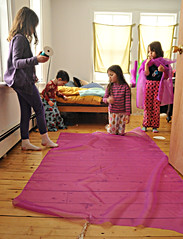
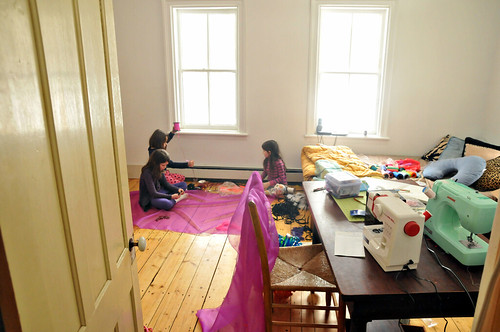
Turns out Vacation Week, thus far anyway, has been replete with play dates and a giggling gaggle of crafty craftersens.

project runway junior gluer


One had a pad of paper, scratching away on designs; another had organized little jewels to embellish the collection they were were creating; and mine was measuring the bolt of "silk" for production.

In no time ...

... the time it took to run the scissor blade down the fabric, to be exact ...

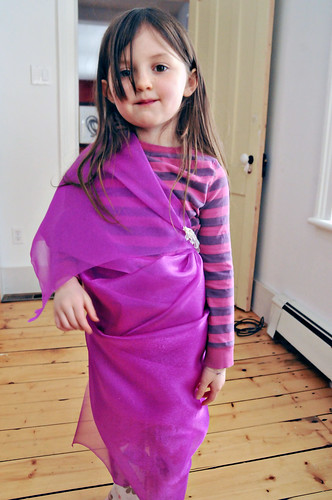
Each girl had a dress to call her own.

pr3

Labels:

Tuesday, February 22, 2011

Room service

overwhelmed


Ittybit hasn't slept in her room since just about this time last year.

I blamed myself.

Every night since the night after that one, she's put on her pajamas, brushed her teeth and bunked down with her brother in his room.

She didn't want to be alone and the lights from cars and other sounds that invaded her mostly curtain-less room were too much to bear.

Of course that last part wasn't made clear to me until this past weekend when she had her first overnight guest, which, for space reasons, necessitated a return to her pink nightmare.

It was all arranged. She would sleep in her bed with her friend, and The Champ would sleep in his old toddler bed that's been providing overflow toy storage behind her dollhouse.

The only problem?

Putting some lids on the drafty old, light emitting windows.

Curtains can't be that difficult, I've told myself ... while perusing the linen aisles at Target. And yet a few yards at the fabric store will set me back nearly double the sale price of the pretty, glittery, purple stripy thing right there.

Don't forget the likelihood that any panels I make would be lopsided, jagged and generally more shabby than chic.

Still, I never flopped any bargain-bin draperies into my basket. Not when she only used the room to play. Ten bucks is ten bucks.

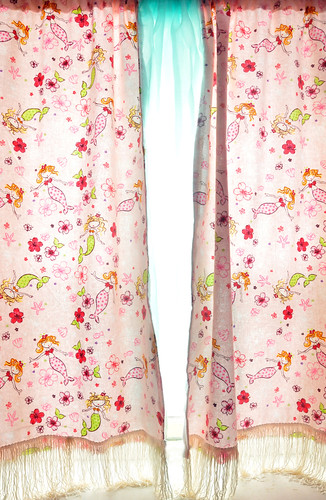
There must have been some divine intervention, though, because just the day before this dilemma, I'd stopped at a fabric store and bought some half-priced novelty flannel thinking I'd make pillowcases. Turns out the two yards of mermaids swimming in flowers I'd impulse purchased would almost (but not quite) exactly fit the two windows needing coverage.

So here it is ... vacation week's first craftacular project ...


JUST KEEP SWIMMING SHADES


WHAT YOU DO

* Measure your windows
* Get all excited that you have JUST ENOUGH material to barely cover the opening
* Then pretty much ignore what ever measurements and fold the fabric in half and cut. Repeat (vertically) for panels
* IGNORE the fact that none of the panels match width wise and REJOICE that you've somehow managed to make them the same length


WHAT TO AVOID
* HEMMING THE CURTAIN ROD SLEEVE FIRST
Thankfully ... Ittybit is skilled with the seam ripper.


hem2


BUT I DIGRESS...
* Pin and hem the edges of the pannels.
* Fold over the top edge about two inches, pin and sew straight across along lowest edge of the fold
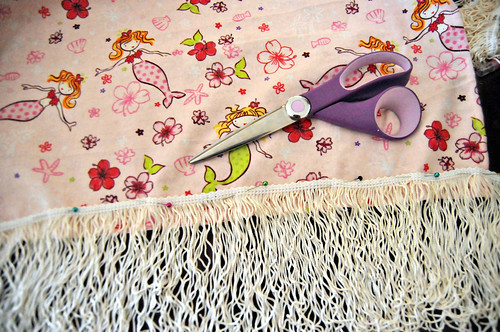
* We then used white chainette fringe to finish (and lengthen) the bottom edges of the curtains. And, YES, I did happen to have some of this stuff just laying around (but I had to look up what this product was called because it had been graciously mailed to us with some other decorative odds and ends).

fringe


THAT'S IT.

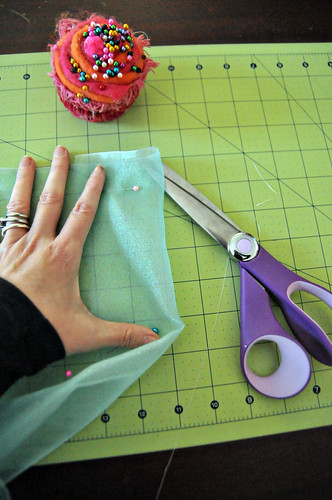
Oh .. well, that, and since we have about a gazillion yards of organza from aforementioned material benefactor, Ittybit picked a color she though would look like cool water for the mermaids. We made a single panel for each window that we squished it in the middle of the rod -- a watery filling for the mermaid sandwich.

hemsheer


THAT WAS IT

curtains2222


All together, it took me about an hour and a half to complete the project but If you know what you're doing I'm guessing it will take about 20 minutes.

******


Now ... I bet you're wondering how well these curtains helped little cherubs sleep?

ARE YOU KIDDING ME?

The first-ever sleepover?

What human child has ever actually slept during a sleepover?

Labels:

Friday, February 11, 2011

Sweet nothings

mini me


Do you remember coming home from school, backpack filled to the brim with love notes and candy?

Yeah ...

Neither do I.

I wasn't a popular kid.

Not that I'm bitter.

Of course, thanks to the great land of artificial sweeteners and ersatz equalization, our kids will never be in jeopardy of feeling unloved ... at least when it comes to hastily-prepared trinkets sent in by other people's mothers as per teacher directives.

Not that I'm cynical ... much.

Anyway ...

Ittybit wanted to do something really special for her friends in first grade, so earlier this month we spent at least a year (in Google time) searching Valentine's Day craft ideas offered at various locations throughout the interwebs.

We found no end of fabulous looking projects, however none could meet my two mandated requirements: 1). That we wouldn't spend a cent on supplies, and 2.) The craft could not cause me to pull out any of my already winter-brittle hair.

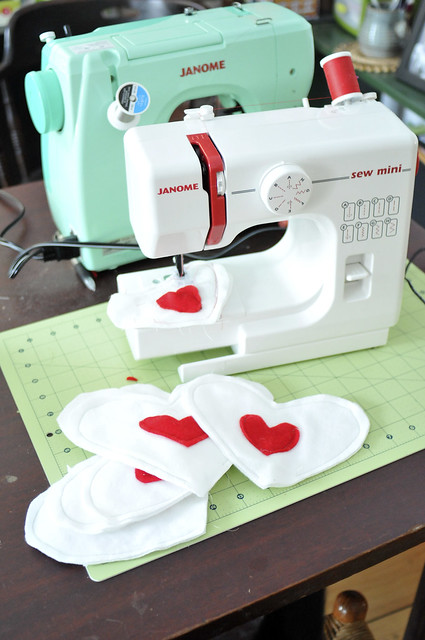
Hence, we ended up rummaging through a box of fabric remnants and found enough of the same materials to make 16 little sweet-nothing pocket pillows.


SWEET-NOTHING POCKET PILLOWS


WHAT YOU NEED
* A yard and a half of white, brushed cotton
* A half sheet of red acrylic felt
* Fiber stuffing

OPTIONAL
* Candy conversation hearts
* Paper hearts for notes

WHAT YOU DO
* Cut out 16 hearts (freehand) out of the felt.
* Cut out 16 sets of hearts (folding fabric for matches) out of the cotton.
* Sew the bottom half of the felt heart (leaving the heart cleavage open) to the center of one side of the cotton heart.
* Sew the two cotton hearts together, leaving a bit at the end to fill with fiber stuffing, and then sew it closed.
*Insert note (or conversation hearts) into pocket.


The best thing about these ... beside using up horded material ... is that they were easy enough for a seven-year-old to make ... with a little help.

mini me

sweet heart


***ADDING A POUND OF NUTS***


valentine cards


So. We had planned to make tiny little notes to put in the pocket hearts ...

But then a friend drew my attention to this

And ... having *JUST* received a copy of her class picture I was like ... Palm meet forehead.

Well, that and THIS is just another reason why I have no hope of ever working for Martha Stewart.

*again with the digression*

So I showed Ittybit and she needed no coaxing. She knows cool when she sees it, too.

Of course we had to change some stuff ... since we had no card stock and our black marking pens are too-thick Sharpies. We used memo-cube paper and pencils instead.

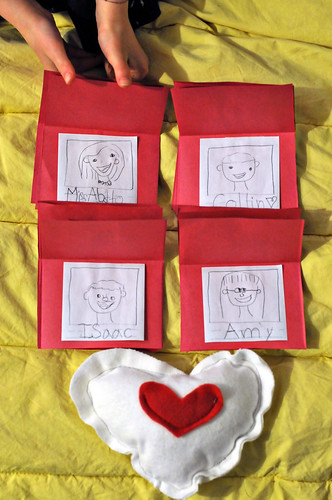
I drew a sentence line and a frame, and also the basic shape of the chin, neck and ears, and she did the rest. She drew hairlines based on her friends pictures and added eyes, nose and mouth as well as their names.

We then folded sheets of red construction paper in half length and width wise and cut them into four rectangles. We folded the paper so that 1/2 inch overlapped, and glued the picture into the crease so that their names were visible and the paper lifted off the card.

Adding pink construction paper hearts to the outside of the card, Ittybit wrote her sentiment and signed her name under the pictures.

almost finished


She's tickled pink with the results ...

Well ... except for Isaac's, poor kid.

"I have to redo Isaac's. I accidentally gave him a bulbous nose."

Labels: ,

Thursday, February 3, 2011

Fantastical creatures and grand plans

There's just something so intrinsically wonderful about Chinese New Year celebrations. The festivities, parades and lore just take all the hope for a bright future and wrap it up in foil and glitter.

I think the best part of it all is watching the dragon dancers say farewell to the year past and welcome another with such active excitement.

And then I thought ...

"Wouldn't it be cool if ...

"Maybe for next year ...

("I'd probably have to start now ...)

"I could get a bunch of kids together to make a costume ...

"And we could have a dragon parade of our own?"

Because really? Nothing promotes teamwork quite like a dozen or so kids covered in fabric trying to snake their way down a road.

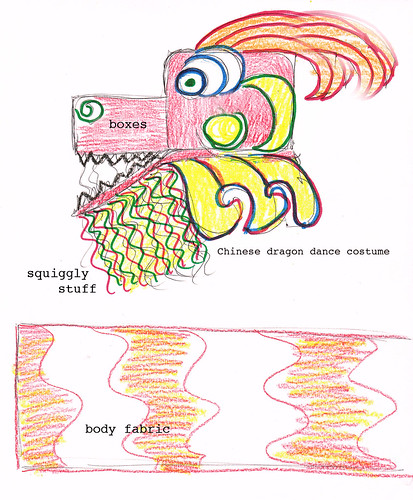
Of course I'll probably forget all about it next year, but I thought making a design plan would make it seem possible:


So this is what I'm thinking we need:

* Two cardboard boxes - one larger and one smaller
* Lots of cereal boxes
* Faux fur scraps
* Some kind of plastic pipe
* A length of chicken wire
* About five yards of some red shiny fabric
* Paint (bright colors)
* Glue

And this is what I think we try to do with it all:

Dragon dancer

Labels:

Tuesday, January 25, 2011

Snowmenly

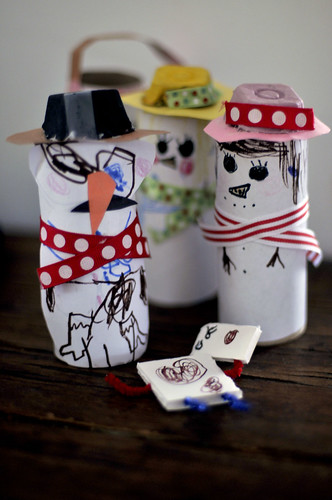
snowmenly


From the snow day archives, courtesy of Lori AKA "The Other Mommy"

WHAT YOU'LL NEED

*The cardboard tubes of toilet paper or paper towel rolls
*White paper
*Colored construction paper
*Crayons or markers
*Egg carton
*Glue
*Stuff to affix with glue (such as ribbon, buttons or sequins

WHAT YOU DO
*Cut white paper to fit length of cardboard roll and glue
*Cut out a cup from the egg container and glue to a construction paper "brim"
*Decorate as desired.

Labels:

Friday, December 17, 2010

Holy craftacular, Batman!

batcave


So ...

You know how The Champ is a fan of bats, right?

*Long, meandering, beside-the-point story alert*

Well, we were out late one night ... well past bedtime ... for a holiday event that almost ensures the kids will fall asleep in the car on the way home and you'll have to carry them up to their beds ...

and hope their teeth won't disintegrate from a night without dentifrice.

*Check. Check. Check ... and Check.*


Of course, Jed is already snoring by the time I'm done making sure the kids are tucked in ... I think I'll go downstairs and surf the interwebs for a while.

... also, I seem to recall feeding time for the dog and cat has been overlooked.

So I head downstairs ... Stopping dead in my tracks at the fourth-step from the bottom.

Because in the living room, FLYING AT ME, is a bat.

Now, I know bats are pretty small and harmless when they're all folded up and hanging upside down in a bat lair, cleverly cut into the side of a mountain by some Hollywood film crew ...

In my house. Where my bed and computer are. The thing was a menacing giant.

Now, I did what any self-respecting, bat-loving, can-do-anything woman would do in a situation like this: I crouched as low to the floor as humanly possible, crawled back up the stairs, closed the doors to the kids' rooms and woke my husband from a sound sleep.

"There's a bat in the house."

"I know. You're parents gave it to him last summer. It came with a ball and glove."

"No. The winged creature kind."

He woke up, went downstairs and commenced to wonder what he was going to do about this predicament. ...

While I sat at the top of the stairs and waited. ...

I heard the opening and closing of doors as he went on a room-to-room check.

"Did he come back your way?"

"Nope. Nothing up here but us chickens."

He was removing picture frames from the walls and banging sheet rock. He went to the Christmas tree and gave it a shake. Nothing.

Then I heard the unmistakable sound of a muffled curse.

"B@$7&%#"

"Did you find him?"

"He went out the door. He's gone now."

"How do you know it's a him?"

"Bad sonar, but won't ask for directions."


*****


OK ... So that's pretty much where the inspiration for this week's craftacular project comes from ... that and the need to have a simple handmade thing-a-ma-jig to put under the tree for the kidlets.

So I put the idea "soft and comfy pillow" together with "winged, rat-like harbinger of terror."

I predict sweet dreams!

WHAT YOU NEED

* A 9' circular pillow form or polyfill.
* Brown fur-like fabric (I cut two 10-inch circles).
* 1/2 yard of Black pleather material (leftover from the bat costume).
* A few triangles of white craft felt.
* A black, fleece remnant (cut into two triangles for ears, and a little mushroom for nose).
* Saftey eyes.
* A 4" piece of ribbon.

UNNECESSARY BUT HELPFUL

* A sewing machine

NOT HELPFUL BUT INSPIRATIONAL

* A live model

WHAT YOU DO

CUT OUT ALL YOUR PIECES

* Cut two circles of brown fabric for the body.

* Cut two bat wings out of pleather. Flip over and use them to cut two more.
make them the same length as the body.

* Cut two, large triangles out of fleece and fold into smaller triangles.

* Cut mushroom shape out of fleece for nose; and cut triangles out of white felt.

ASSEMBLE THE PARTS

* Cut tiny slits for eyes in the front side of the body fabric and insert safety eyes; secure the backs. Next sew on nose and teeth. I sewed around the entire nose, but secured the teeth only at the top.

* Flip wings so the outsides face in, and pin them together. Sewing around three sides of each wing. Turn right-side out through the end opening. Use a pencil to poke any tight spots out.

* Take the ear triagles and sew around the edge, leaving room to turn it right side out.

* Being careful to put the ears at the top of the face, turn the body circles right side in and sandwich the fabric over the wings, Ears and ribbon loop (also pointing inward). Pin around the outside.

* Sew around the whole thing, making sure to secure the appendages and leave enough room to insert the stuffing or pillow form.

* Turn right side out.

* Insert stuffing or pillow form.

* Close up the opening.


AND THERE IT IS ...

A flightless rodent you're kids CAN cuddle.


*In case you're wondering ... I put the ribbon loop at the bottom so he can hang upsidedown when he's taking a nap.

Labels:

Friday, December 3, 2010

Practically a law of nature ...

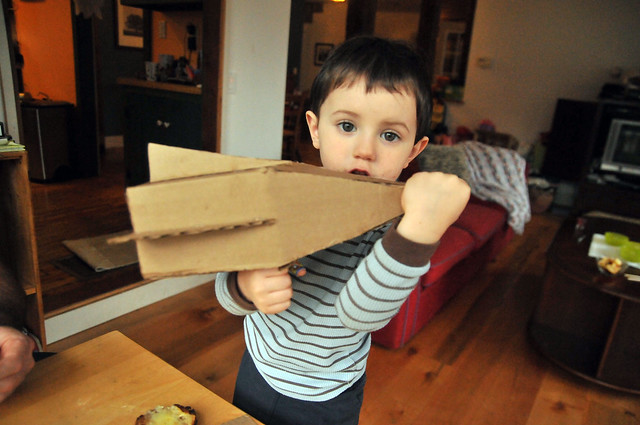
Give a kid a a gift, and they'll play with the box.

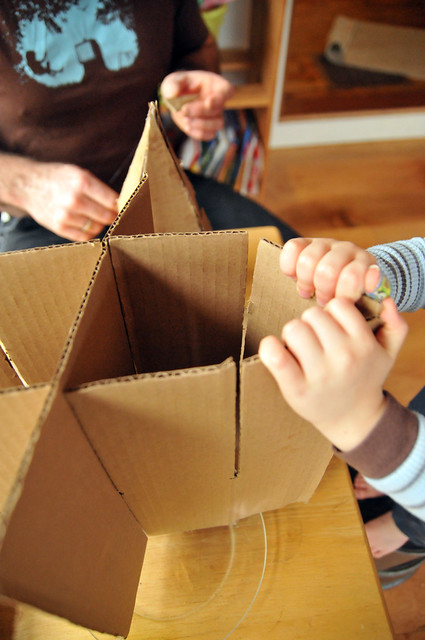
insertsbox


So, without further explanation: I present ROCKET BOX.

closehatch


WHAT YOU'll NEED


* The bottle separators from a LARGE case of wine
* Scissors
* Hot melt glue gun

MAY BE NICE ... BUT NOT NECESSARY

* Paint
* Glitter
* Markers

TOTALLY A SPLURGE

* The wine that came in the box.

herrocketship


WHAT YOU DO

escapehatch


* Take the inserts out of the box.
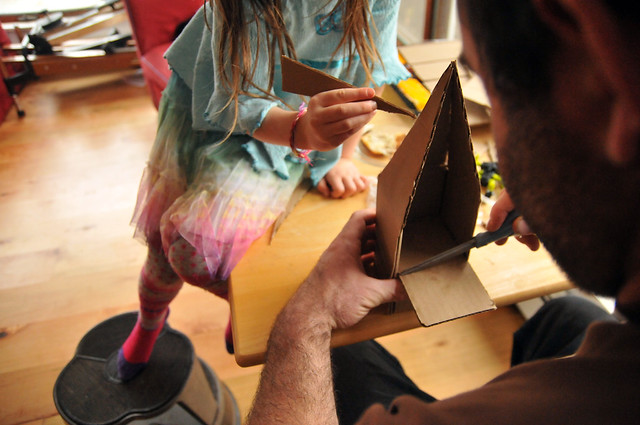
* Cut away one section of cardboard from a four-section piece.
* Cut the top of the remaining tabs into triangles.
* Fold so that you have a square box and pointed end.
* Glue the edges in place creating a box and nosecone.
* Cut another triangular piece and glue into the nosecone.
* Take the fourth section of cardboard and glue it into the bottom of the rocket, a section will extend past the box. Allow enough extra space so that it "catches" under the rocket's nosecone.
* Score the bottom piece of cardboard and fold it upward to make a flap.
* Add as many floors (compartments) to the rocket as will fit.
* Cut more triangles and glue to exterior ... these can be handles.
* Decorate or leave plain

rocketshipfinished


* Spend the next several hours in test-flight operations.

Also ...

thanks, dad


Say 'Thanks' to the engineer. He likes to be appreciated.

Labels:

Tuesday, November 30, 2010

Sometimes ideas just pop up

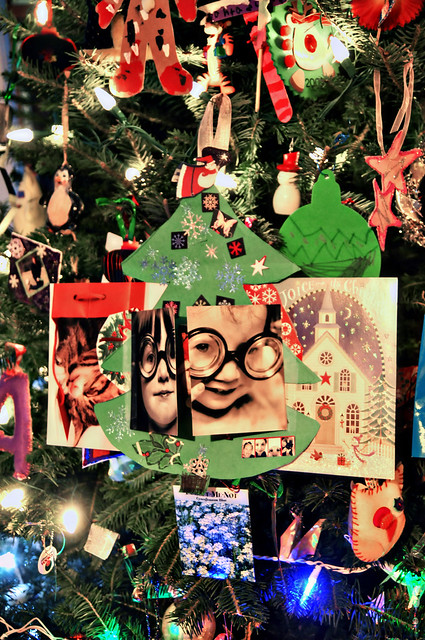
homework - a christmas tree made of last year's cards, stickers and a surprise


Each year teachers send Ittybit home with a family project: a construction paper Christmas tree she is to cut out and we are to decorate together.

They hang them in the hallways of school during an open house and a festival of trees closer to Christmas.

It's quite possibly my favorite "family homework project."

Last year she mostly decorated the tree herself, refusing to let us get our scabby, germ-y, cootie-fied mits anywhere near "her tree." (She was more polite than that, but you get my point. She's got her ideas, and ours were just trying to pull the wool over their eyes.

This year, however, she accepted ideas as well as some help. I pulled out last year's Christmas cards and we cut out some pictures and shapes and glued them to the tree. She did most of the hot-melt glue gunning (No one ever thinks when they shell out $4 bazillion dollars for school supplies every September that they'll ALL. GO. TO. SCHOOL and they'll be left scrounging the house late one night in November looking for a worn down pencil nub and a dried up old glue stick to complete HOMEWORK now do they? Nope. They don't.)

But I digress.

We do have a glue gun with which we can stick stuff to other stuff, and not once did Ittybit shoot herself in the fingertips with it.

*whew*

Any way ...

She set about filling the tree with stars and stickers and Hallmark sentiments, and thinking of how to use the images she'd had me cut more precisely. We had a wreath, a horse and rider, a photo card from last Christmas with pictures of the family, a cat inside a gift bag and a sleepy little town covered in glitter snow.

She looked at me with narrowed eyes and a crooked mouth.

I reminded her of her love of pop-up books and her brain box started buzzing.

We taped pictures of she and her brother's funny faces barn door-like over the horse on an piece of accordion-folded paper.

She added a cut-out flying Santa as a star. Behind it all were cards to stabilize the tree and a ribbon hanger.

It was so big she had to hand carrying it to school because it wouldn't fit in her school folder.

She didn't mind.

She didn't even worry that kids would make fun of the silly faces that were holding back the equestrian surprise.

It was the best tree ever.

And laughing was allowed.

Labels:

Friday, November 5, 2010

If a leaf falls in the parking lot will anyone hear it?

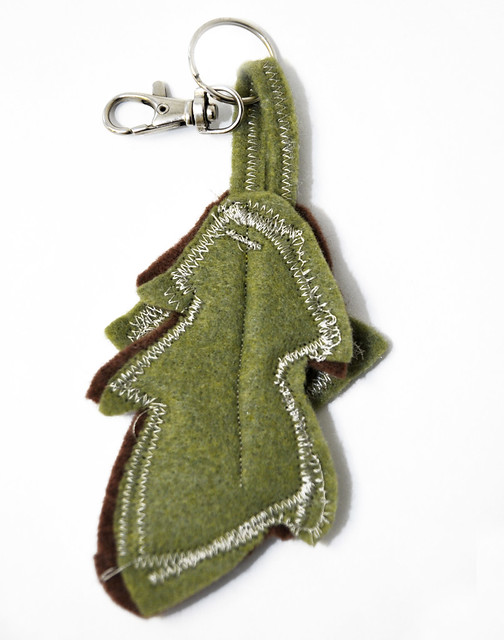
Maybe, if it's attached to your keys.

if a key chain falls in the forrest


This was a quick and easy project.

First I found an old key fob and cannibalized the ring mechanism.

Then I found some earth-toned scraps of felt and cut them in a manner that resembles no leaf found in nature. I also cut a long, rectangular strip of felt, folded it in half length-wise and sewed it along the length with a zig-sag stitch.

Next I threaded the keyring with the "petiole," folded the fabric and inserted the ends in between the two sides of "leaf" at the top. Then I sewed it all together at the point of the axil and continued sewing along the outer edges of the leaf.

I then attempted to sew veins on the interior of the leaf.

I got as far as the mid rib and gave up.

Next time I might use this as a reference.

Or maybe I'll just bring a leaf inside.

Labels:

Friday, October 29, 2010

Activity books ... not as oxymoronic as the name would imply

100shapes

Oh ... you know we love books. Which is what makes it possible for me to scoff at a recent bit of fluff in the Gray Lady that simultaneously tries to sound the death knell of picture books while blaming parents for their murder.

It's true though, we sometimes borrow steal buy books that inspire us to do other things ... such as draw our own picture books.

For instance, Seven Footer Press (disclosure! I have a dear friend there) has a bunch of wonderful activity books in its collection that allow kids (of all ages) to use their imagination and fill in the blanks. Our favorite is "100 Shapes," a book of stencils by Nao Sugimoto, the pages of which can be cut out, put on a key ring and used over and over again on any number of important art works.


$1


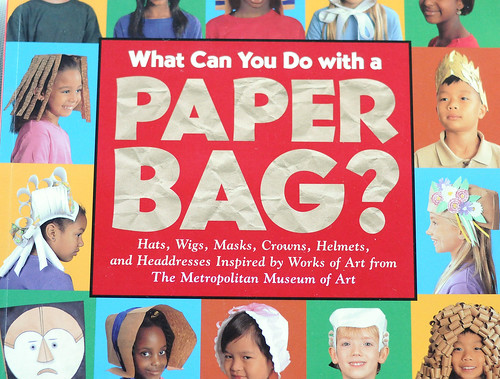
Judith Cressy's "What Can You Do With A Paper Bag" has been a favorite of ours since we picked it up at a library book sale a few years ago. The activity book takes its inspiration from the Metropolitan Museum of Art's collection and provides step-by-step instructions on making hats, headdresses and wigs out of paper bags.


beauty


And though it's not an activity book per say, Robert Sabuda's latest pop-up sculpture wonder, "Beauty and the Beast," has both kids foaming at the mouth to make their own three-dimensional storybooks. Which leads me to think maybe Santa will leave one or two of these little books under the tree.

Another book we are fond of is the homemade sketchbook.

book


This thing was born one night shortly before bedtime when it became painfully obvious (by the eardrum-piercing shrieks) that there was a notebook inequity among sprogs. Namely, Ittybit had many and The Champ had none.

In fewer than five minutes with my sewing machine I was able to manufacture a book and a happier bedtime.

THINGS YOUR NEED

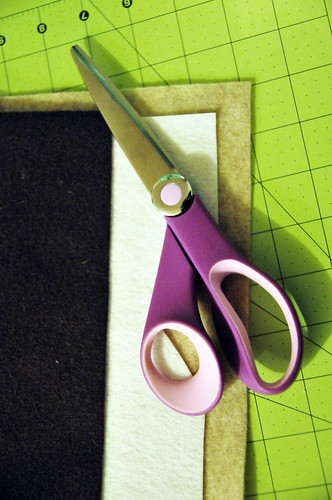
* Two 8.5" x 11" sheets of craft or wool felt
* One 8.5" x 11" sheet of web interfacing
* 8 or 10 sheets of letter-sized paper
* Thread

THINGS YOU DON'T NEED ...
BUT WILL MAKE LIFE SO MUCH NICER


* A sewing machine
* Some felt scraps for embellishments

WHAT YOU DO

zig-zag stitch


* If you are sewing a heart or flower onto the cover, do that first. Cut out your embellishment and place it on the center right side of one sheet of felt. Sew all the way around the edges with a zig-zag stitch. (It doesn't take long with a sewing machine, but if your kid is screaming and can't be consoled with chocolate or beer, skip to the next step.

layers


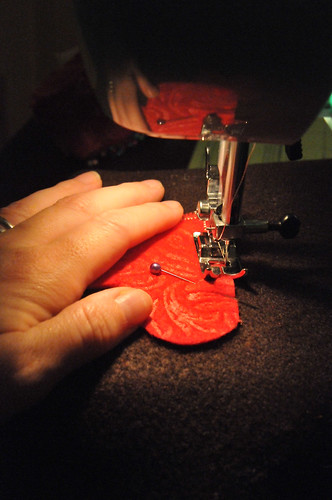
* For the cover, sandwich the sheet of interfacing between the two sheets of felt and sew closed. I sewed two paths using zig-zag stitch: One to secure the interfacing (my interfacing scrap wasn't large enough to reach the edges) to the felt and the other to close the edges.

stitch


* Center the sheets sheets of paper onto the cover and sew along the center using the widest straight stitch available on your machine. The closer your stitch the more perforate-y your pages will be.

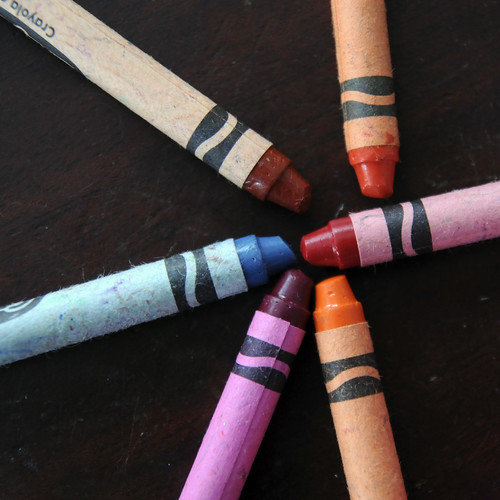
Of course, if you give a kid a sketchbook before bedtime you'll have to find some crayons.

Worn and broken color wheel ...


Beware of the broken ones.

Labels:

Friday, October 8, 2010

How speicies REALLY evolve ...

As is usual for plans ...

They start out grand:

Plans ....

Or as grand as your illustrative skills can draw them.

Then your plans meet your skills ...

Which are decidedly less than grand:


I'm speaking of my own skills, of course, not yours. I know you don't come here for the craftacular tutorials. You are smarter than that.

But I digress.

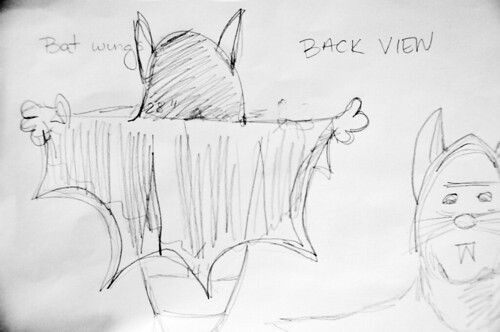
Where were we? Oh yes, my skills meeting my plans and taking each other outside for a brawl. That's a fair assessment of what happened when I tried to make bat wings for the boy's Halloween costume.

Let's go back to the near beginning, when I visited the fabric store masquerading as a woman with seamstress-like skills. That would be where I made my first egregious blunder: I selected black pleather and light gray satin for the wing material.

My only defense is that they were between 30 and 50 percent off and I was deluded by the jump on seasonal sale prices. Well, there's that and the parenting voice in my mind that thought a light silk would be more reflective at night (as if I was planning to let the little guy traipse around trick-or-treating without my vice-like grip in his arm.)

Again with the digression.

Anyhow. All was going as planned.

wingcut

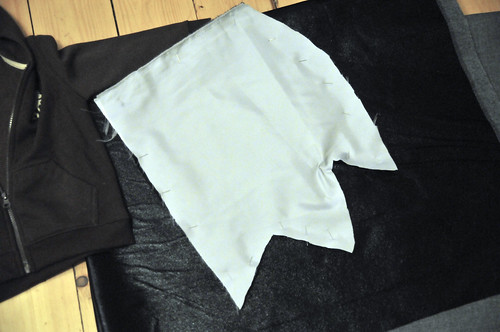
I'd carefully kinda measured the pleather against the arm of a brown hoodie and cut out a half circle of the plastic-y fabric. I turned it, right side, against the pleather and cut another for the opposite arm.

Next I cut out pieces of satin using the pleather wings as a template.

wingpinA

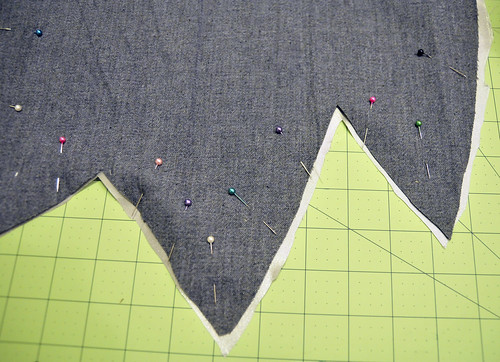
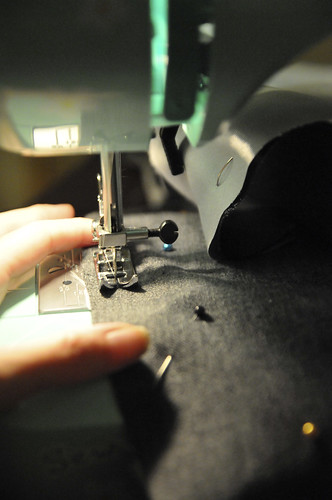
I then pinned the fabrics of each wing - right sides inward - and sewed around each one, leaving enough room to turn it right side out.

sewwing

Of course then I had to figure out how to attach the little suckers to the sweater.

Which meant I sat there for quite a while looking off into space and sewing up some black fleece triangles to jam into the hood part for ears. Again with the precision. Basically, I made over-sized black bunny ears, cut slits on either side of the hood and sewed the ears pointing outward.

(I also cut a pumpkin shape out of felt and sewed it over a monkey that didn't belong on the hoodie, as instructed by the little man.)

But eventually I was forced to revisit the wing attachment problem. Now, at the store, I thought the satin would go in front, but immediately realized it wouldn't look like a bat if I did that ... I also realized with the satin the back was going to look like a torn off prom dress.

But I was already committed to the abomination.

My preferred method to attach them would have been to seam-rip the edges of the hoodie from arm cuff to waist cuff, turn it inside out, insert the wings into those seams and sew the thing back up again.

But I know my skills, and that was just asking for trouble.

So what I did was convince myself that the sweatshirt was WAY TOO BIG for the little guy anyway (not to mention made of a nice, stretchy material) so I'd just sew the wings on to the outside, nipping in the arms and torso of the hoodie.

pinnedhoodie

Of course it might have helped if I actually pinned them in the same general vicinity of each other, instead of one in the front of the sleeve and the other in back, but ...

It would be dark. ... No one will notice.

Which is probably true. ... As is the closely-held belief that the memory of a homemade costume will turn mythic as time wears on.

Or so I will tell him.

Until he agrees to wear it, however, his sister will have to model the suit of flying mammal.

Nananananana nananana BATGIRL!

Labels: