King Me: A craftacular tutorial
That was the start of wanting to be more connected to craft.
I'm sure you know by now I'm not really crafty.
You may admire my photographs. You may think I'm mildly skilled with the written word. But when it comes to following patterns, or plans, or directions, or recipes ... I'm about as sharp as a wet mouse.
I was once proud of this.
Sad, huh?
I blame Etsy for making me want to improve.
Etsy made me appreciate handcraft. And made me realize how hard it is to make anything that LOOKS simple.
Etsy also made me beg and plead with Santa to put a sewing machine under the tree for
So ...
So ... here it is, my first "IF-I-CAN-DO-THIS-IT-CAN'T-BE-THAT-DIFFICULT" tutorial:
Stuff you need:
Two pieces of craft felt
Matching or coordinating thread
About a 1/4 yard or so of fusable interfacing
Elastic
Some cotton fabric
Things you don't necessarily need but are helpful:
A sewing machine
About 45 minutes
A tasty beverage

The first thing I did was measure the kids' heads to get a general size of their cabasas. And then I pretty much ignored the measurements.
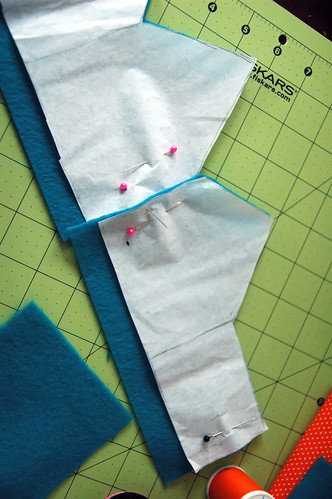
Then I made a template on tissue paper. I drew it free-hand, cut the pattern in half and pinned the halves to a piece of craft felt. Cut out the felt pieces, and repete the process on another piece of felt. I used two colors. **You want to be careful to make sure that the edges of the halves that well be seemed together are straight and fit exactly. The rest of the edges can be trimmed later. (You'll notice that for whatever reason - probably insanity - I added about an inch to make a taller crown).

Using a zigzag stich, sew the seems together on the felt pieces. Be careful to evenly span the stitch over the two pieces. I kept going over it and over it to make sure it wasn't going anywhere. I also put a "faux" seem to make the crown's peaks look balanced.

Using the same template, I cut out another crown form of sturdy interfacing. ... And then I couldn't, for the life of me, figure out how to get the interfacing to adhere to to the fabric. I used an iron on the wool setting as the directions instructed. But it didn't work. ... So I pinned the whole thing together and sewed it ...

Around all the edges except for the ends.

Then I measured the difference between the crown and the kids' cabasas, and I cut a length of elastic that seemed appropriate. I then cut a section of fabric twice that length, and sewed a lengthwise seem with the fabric folded inside out. I right-sided the fabric and slipped in the elastic, pinning it at one end and squelching the fabric down to find the other end, than pinned the other end.

Next, I stuffed one end of the homemade scrunchy into the open end of the crown between the one side of the felt and the interfacing and top sewed it closed. Then I did the same thing with the other side.

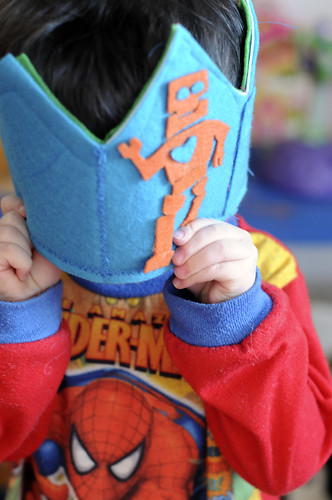
I cut out some fancy stuff in felt ... you could use a printout of a letter in your favorite font ... and glued it to the finished crown. (If you want to decorate the crown with things like buttons or other decorations that require sewing, you should do this BEFORE you attach the felt to the interfacing).

Did I mention the crown is reversible?

Which side is this? Front? Back? I dunno.

The kids can decide when they dress it up with do-dads and whatsits of their own.

Crowns are fun ...

no matter how you wear one ...

 RSS
RSS


